How To Replace A Tap
Taps might be the last thing you think about breaking in your house. But like everything, even taps have a natural life cycle. So, if you find yourself in a tricky tap situation, how do you fix and replace it? First things first, there are three types of taps installed in homes:
A screw with gasket, a ball valve, or a cartridge (single control).
If you have a screw with a gasket tap, it unfortunately cannot be repaired, and must be replaced.
When it comes to removing taps, it’s important to note they require different processes and disassembling procedures. These are dependent on the type of dispenser and installation. Let’s look at the three classic cases…
Step 1
Disassembling and reinstalling an external tap
In general, taps outside the house are usually the ball valve or screw type.
In most cases, these taps are screwed onto a threaded sleeve that is inserted into a structure, (such as an external wall or column) flush with the surface. The threaded connection is usually hidden by a circular mask that completes the tap. Disassembly is simple with this type of tap.
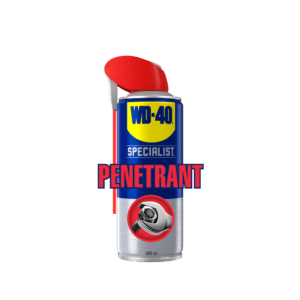
First, shut off the water supply to the main valve of the house. The body of the dispenser must be grasped fairly close to the threaded connection using a parrot wrench, then rotated counter clockwise. If it is difficult to turn, we suggest applying some WD-40 Specialist Penetrant on the threading. This will quickly penetrate and loosen the tap for easy removal. The formula is also water-resistant, so it will work even if there is residual water.
Once the tap has been unscrewed, we suggest washing out the thread of the wall sleeve with a toothbrush or a pipe brush. If you’re not immediately installing a new tap, it’s also best to screw in a threaded cap.
You can then go about installing your new tap, following the manufacturer’s instructions closely.
Step 2
Removing and replacing a wall mounted interior tap
Wall-mounted kitchen or bathroom sink taps are connected to two threaded sleeves (for hot and cold water) that protrude from the wall, using two hexagonal-nut threaded ferrules.
First, remove the broken tap by gripping the ferrules with a fork wrench or adjustable wrench and turning counter clockwise. Once you’ve finished unscrewing, the tap can be removed. If the tap is tricky to remove, you can use WD-40 Specialist Fast Release Penetrant on it to ease the unscrewing process.
The two S-shaped fittings used to adjust the distance of the connections (which are fixed because they are in the wall) to that of the tap connections should remain screwed on the wall sleeves. These adapters can be left in place, or be removed to be replaced with new ones. In any case, they must be subsequently rotated to adapt to the distance of the connections of the new tap.
Step 3
Replacing a kitchen tap
If the tap to be replaced is installed in the kitchen sink, a different process must be followed.
The bottom of the tap has a large threaded connection with two pipes (usually flexible) which connect the hot and cold water wall connections. The threaded body is inserted into the sink and locked, from below, with a large nut.
In the first instance, start by disconnecting the two pipes from the hot and cold water supply on the walls under the sink. You’ll need to unscrew the two ferrules on the water supply (always remember to shut off the inflow of hot and cold water beforehand). At this point, you can unscrew the large nut that blocks the threaded connection of the tap.
You’ll have to do this step under the sink; this may be uncomfortable based on the space and position of the nut. Once you’ve removed this part, you can remove the tap from above by releasing both its threaded base and the two pipes that were connected to the supply from the hole in the sink. If this proves difficult, you can apply WD-40 Specialist Penetrant to loosen it.
Step 4
Disassembling and removing a bathroom sink tap
The tap used in a bathroom sink can be disassembled like the kitchen tap. The threaded part inserted into the sink is usually not tightened with a nut but has a metal plate (usually crescent-shaped) mounted with two screws and an interposed gasket.
Also, in this case, it may be useful to loosen the screws with WD-40 Specialist Penetrant before disassembling. The sink also has a plug lifting system consisting of some movable rods connected to each other with joints. These rods must be disconnected before the tap can be removed from the above.
Now you can enjoy your new tap
The uses shown and described for WD-40 Multi-Use Product were provided to WD-40 Company by the users themselves. These uses haven’t been tested by WD-40 Company and do not constitute a recommendation of suggestion for use by WD-40 Company. Common sense should be exercised whenever using WD-40 Company products. Always follow the instructions and take heed of any warnings printed on the packaging.
Contact Us
© 2025 WD-40 Company.
All Rights Reserved


