


How To: Bike Cassette Removal
The bike cassette is attached to the rear wheel of your bike, it consists of different sprockets on which the bike chain rests. The bike cassette allows you to change the chain transmission ratio, meaning it allows you to change gears on the bike which we all know is very important. As the bike cassette is exposed to weather, mud, dust and oil it obviously gets dirty over time and it becomes necessary to remove the bike cassette and give all the parts a thorough cleaning. This vital job doesn’t have to be a difficult one though, follow our steps below to become a bike cassette removal and maintenance pro!
Things you will need
Flat key
Cassette extractor kit consisting of a cassette extractor and a chain whisk
Adjustable spanner
Basin + water
Brush
Microfiber cloths
Step 1
REMOVE THE REAR WHEEL FROM THE BIKE
In order to thoroughly maintain your bicycle cassette, you must first disassemble the rear wheel of the bicycle and then remove the cassette from its location. Put the chain on the smaller chainring and the smaller sprocket. Squeeze the brake shoes at the cable, then remove the detent cable allowing the pads to move away (if you have disc brakes just remove the calliper). Open the quick release knobs or unscrew the nuts that lock the axle with a suitable open-ended wrench. Finally, hold the derailleur back, remove the wheel axle by pulling it to one side or the other, then you will be able to remove the bike wheel.
Step 2
HOW TO REMOVE THE BIKE CASSETTE
The second step before degreasing the bicycle cassette is to remove it. First, install the cassette extractor on the nut provided for this purpose. Then, install the chain whip in order to block the rotation of the cassette when removing the lock nut. You will then place an adjustable wrench on the cassette extractor and loosen the lock nut by turning it counter clockwise. Once sufficiently loosened remove the adjustable wrench and finish unscrewing the lock nut by hand. You can then remove and re-store the chain whip. Once the lock nut has been unscrewed, remove the cassette extractor. Finally, remove the various elements from the cassette. Now the have removed the bike cassette you are ready to move on to the cleaning!
Step 3
HOW TO DEGREASE BIKE CASSETTE
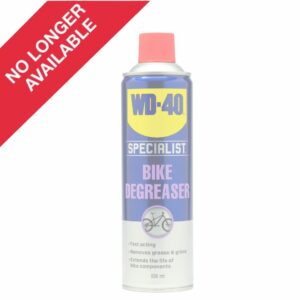
Now it is time to learn how to degrease your bike cassette. Firstly, you will need to wet the elements of the cassette, either by immersing them in a basin of water or by running them under a tap, this will remove the first layer of dirt! Next you should spray each sprocket with WD-40 BIKE Cleaner. Leave the product on and scrub with a bike cassette cleaning brush to remove all the grime. If necessary, you can use WD-40 BIKE Degreaser which will easily remove stubborn stains. Finally, rinse each sprocket with water and dry them thoroughly with a clean, dry cloth.
Step 4
REPLACE THE CASSETTE ON TO THE WHEEL
After cleaning the cassette of your bicycle, you will be able to reassemble it in its location. Align the small notch of the cassette with that of the freewheel body. Then replace the locknut and tighten with the adjustable wrench in a clockwise direction.
Step 5
REMOUNT THE REAR WHEEL ON YOUR BIKE
Pull the derailleur back and put the chain on the smallest sprocket, then put the wheel on the fork. Slowly release the derailleur and make sure the wheel is aligned in its axle. You will then need to tighten the nuts that hold it. Then tighten the pads or place the calliper on the discs (if you have disc brakes). Finally it is important to check that the brakes are operational don’t forget the brake pads should not be touching the wheel.
A BICYCLE CASSETTE LIKE NEW!
There you have it a properly cleaned bike cassette, which will ensure you have no trouble changing bike gears! After having thoroughly cleaned your bicycle cassette, remember to also clean the bike chain and lubricate the bike chain too luckily we have useful blogs explaining how to carry out these jobs too!
The uses shown and described for WD-40 Multi-Use Product were provided to WD-40 Company by the users themselves. These uses haven’t been tested by WD-40 Company and do not constitute a recommendation of suggestion for use by WD-40 Company. Common sense should be exercised whenever using WD-40 Company products. Always follow the instructions and take heed of any warnings printed on the packaging.

